Data Recovery With TestDisk
A friend of mine plugged their external hard drive into their set-top box to watch some movies on their TV. A message about drive formats flashed up, buttons were pressed, and the drive was rendered useless. Oh dear.
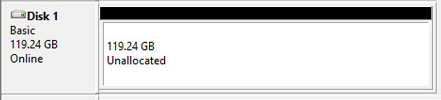
First off, I plugged the drive into a Windows computer. I didn’t get the usual happy confirmation or popup dialog, which means there is definitely something wrong. A good place to start is Windows Disk Management (Control Panel -> Computer Management -> Disk Management) - this will show all the hard drives that the computer can actually recognise as connected.
Our injured drive is visible, which you can usually expect when there is a software issue, instead of something like dropping the drive or it catching on fire. We can see the source of our problem here, in that the space for our drive shows as unallocated. Windows can’t find any partitions (logical ‘sections’ of the drive) which means we can’t access our data. As far as Windows is concerned, this hard drive is just a blob of random 1’s and 0’s with no meaning.
In this case, this works to our advantage. Windows may not recognise the 1’s and 0’s, but the data on the drive hasn’t changed since it did have some meaning, which means we may be able to recover most of our files. In other words, the files are still on the drive, Windows just doesn’t know about it.
Depending how the partition was destroyed, it may be able to be recovered, which would be the easiest solution. To recover a lost partition, let’s take a look at TestDisk. TestDisk is a good choice because it’s free, works on every platform as isn’t full of ads. Hooray.
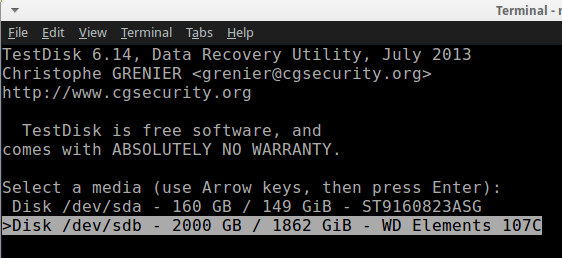
I switched over to my Ubuntu machine and started testdisk. The drive should be listed and have the correct size, select it.
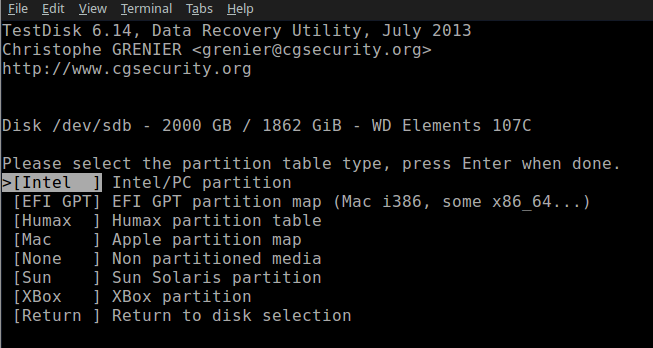
TestDisk will default to the partition type it thinks is correct - normally this is the best to go with. For this drive, I selected Intel/PC partition and continued.
From here, I selected Analyse. This looks over the drive and will show you any partitions, and let you attempt to recover lost partitions.
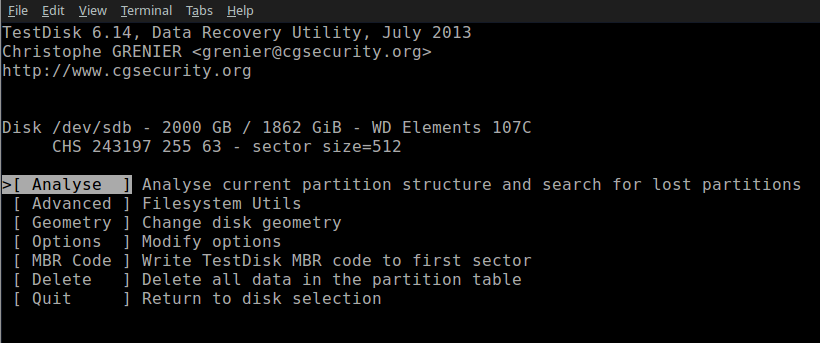
Alas, no partition is bootable on this drive. This confirms what Windows told us.
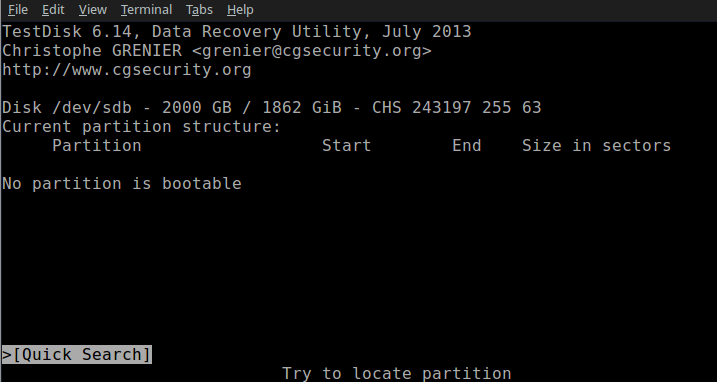
From here, we can try to recover partitions by selecting Quick Search. Don’t let the name fool you, this took 3 hours on my 2TB drive. Unfortunately TestDisk couldn’t recover the partitions, but all hope is not lost. The partitions provide information about the data on the drive, but as I mentioned before, the data is still there even without the partitions, provided it hasn’t been written over.
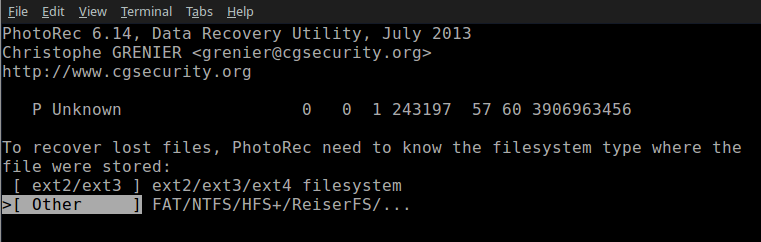
Using a tool called PhotoRec which comes bundled with TestDisk, we can just look at the sequence of 0’s and 1’s on the drive and try to recognise where files may start and end. A note about how this works - the name of a file isn’t actually stored as part of the file. In NTFS (the format of this drive) at the start of the drive, there is a table which maps a filename to a location on the drive. That means that if we just read the raw data from the drive, we won’t be able to recover the filenames. This isn’t ideal, but we don’t really have a choice.
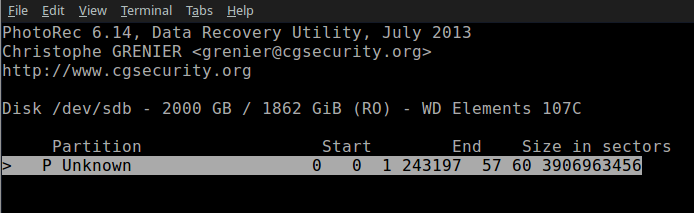
I fired up PhotoRec and selected the hard drive as before. I selected Other for the filesystem type, as I can see NTFS in this list.
PhotoRec also can’t see any partitions, so it guesses at a default partition that takes up the whole drive. This is what we want, so I select that.
From here, I needed to select a place to copy the files to. After about 24 hours the recovery completed, and I had a few thousand pictures and video files to go through. Success!